Rails are the most crucial part of this mod (of course, the trains are important too). Since the 2.0.0 update, trains no longer run on the default Minecraft rails and these rails are used instead. The mod includes eight types of rails:
- Normal straight and curved rails
- Booster rails
- Upwards sloped rails
- Downwards sloped rails
- Detector rails
- Station rails
- Reverse rails
- Intersection rails
The usage, function, and placement of these rails are explained in detail below. See this article for rail switching.
Recipes
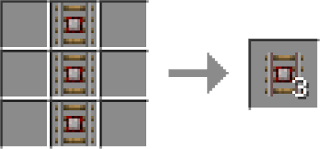
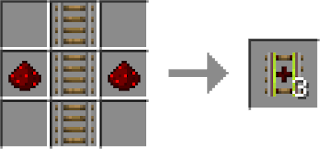
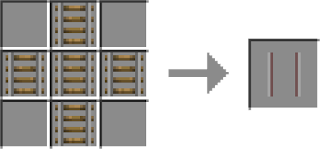
The recipe of the different types of rails are shown below. They are shaped recipes and are crafted from Minecraft rails.
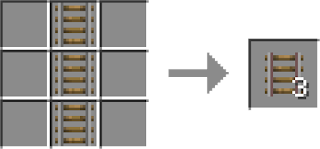 |
The normal rail recipe.
Note the slight color difference between Minecraft rails
and the rails in this mod. |
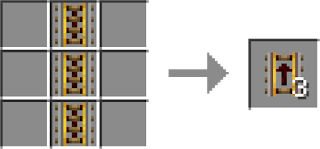 |
| The booster rail recipe. |
 |
| The upwards sloped rail recipe. |
 |
| The downwards sloped rail recipe. |
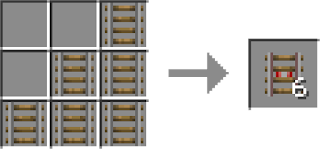
 |
| The detector rail recipe. |
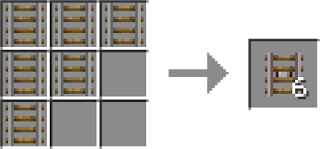
 |
| The station rail recipe. |
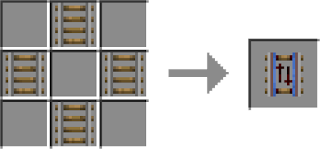 |
| The reverse rail recipe. |
 |
| The intersection rail recipe. |
Operation and Physics
Placement
Unlike Minecraft rails, rails in the mod can be placed in eight different directions instead of four. This means that diagonals can be created.
Normal rails are quite different from Minecraft rails in that long stretches of track can be created at once. To place straight rails, follow the steps below.
- Stand and face in the direction where you would like the rails to go.
- Place down a normal rail. A chat message should pop up saying "Connecting to [x, y, z]". When you hover over the rail youre holding in your inventory, it should also say "Connecting to [x, y, z]".
- Walk in a perfectly straight line and place down another normal rail. The elevation must also be the same.
- A straight section of track should be created between the two rails that were placed.
To place curved rails, follow the steps below.
- Stand and face in the direction where you would like the rails to begin.
- Place down a normal rail. A chat message should pop up, "Connecting to [x, y, z]". When you hover over the rail youre holding in your inventory, it should also say "Connecting to [x, y, z]".
- Walk to the endpoint of the desired curve. Place down another normal rail in the orientation that will fit the curve. 90 and 45 degree curves are allowed.
- A curved track should be created connecting the two rails that were placed.
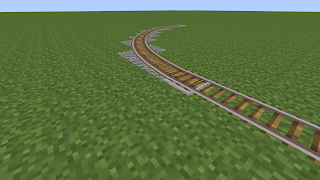 |
| An example of a curved rail. |
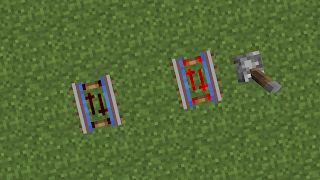
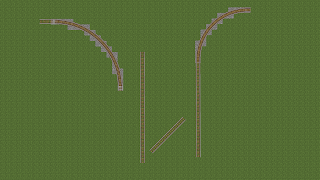 |
| Other examples of rails. |
Curved rails can be used to create splits. Put a switch lever adjacent to the "stone slab textured" block of the curved rail.
Booster rails, detector rails, station rails, and reverse rails can be placed like normal Minecraft rails but with eight possible directions.
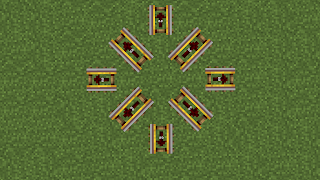 |
| Booster rails in eight different orientations. |
Upwards and downwards sloped rails will create a straight section of track of sixteen blocks that go up or down one block. Trains will move up or down accordingly.
 |
| Sloped rails go up one block vertically and sixteen blocks horizontally. |
Behavior and Usage
Booster rails are very important because trains can only be placed on them. When powered, it will be in booster mode; when unpowered, it will be in slowdown mode. As a train goes over a booster rail, it will be constantly accelerated or decelerated until the speed of the booster rail is reached.
When right clicked by a brush, a gui will open. There are two editable values, the boosted speed and the slowed speed. Depending on whether the rail is powered, the train will accelerate or decelerate to that given speed. The maximum speed that a train can be boosted to is 50m/s and the minimum speed 0m/s.
The recommended speed for trains is 19m/s. If the train goes over 20m/s, there will be a chance that it will miss the booster, detector, slope, and station rails and ignore them completely. Also, the train could derail at curves. Speeds over 20m/s can be safely used on long stretches of straight rails, but multiple unpowered booster rails in a row at the end of the stretch should be used to ensure that the train slows down properly.
Detector rails work just like Minecraft detector rails. When any train car passes over the rail, a redstone signal of power 15 is emitted.
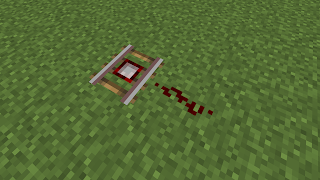 |
| A detector rail with redstone dust connected to it. |
Station rails can be used to stop the train and/or change the route of a light rail train. When a route changer block is placed under a station rail and a light rail train passes over it, the destination display will change. See the route changer page for more information.
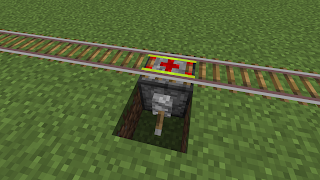 |
A route changer block underneath a station block.
The station block is powered so that trains will change their
routes without stopping. |
The train timer can be placed next to the station rail to make train doors open. See the train timer page for more information.
 |
| A train timer next to a station rail. |
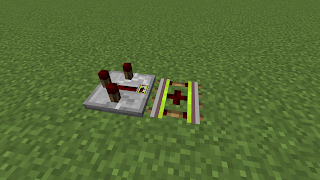
Reverse rails are used to reverse the direction of the train. They will only function when powered; if unpowered, the rail acts as a normal straight rail.
 |
| An unpowered reverse rail next to a powered reverse rail. |
Intersection rails act like straight rails and are used when rails cross over. They will automatically be spawned when two overlapping sections of rails are generated. The intersection rails can also be manually placed, connecting to all adjacent rails.
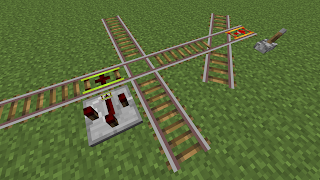 |
| Two examples of the intersection rail. |